How to Create and Host a Cloud Python 3 Web App FREE (Part 1)
Introduction
For people new to programming, going from print('Hello World') to actually building/hosting a useful app can be a daunting task.
Thankfully in 2018 this is as easy as it’s ever been with cloud providers like Amazon Web Services, Google Cloud Platform, Microsoft’s Azure, and many many more.
But even those are difficult for new developers to get their head’s around (Load Balancers? DNS?).
The best tool I’ve found for a brand new developer is Glitch. Launched in 2017 it was created as a tool for creating and hosting JavaScript Node.js web apps.
Glitch is a combination of an text editor or integrated development environment (IDE), and a hosting server that actually runs the code you create. It really is a superb tool for creating and hosting web apps.
Best thing? It’s free! Obviously they have restrictions, for example only 4000 requests per hour. Still, for beginners it’s a perfect place to start.
Yes, I said Node.js apps, not Python 3. Thankfully though, a server is just a server, meaning you actually have access to a virtual Linux machine in the cloud. This virtual machine is running Ubuntu 16.04.5, which means you have access to Python 3.5. Ubuntu also has Legacy Python (version 2.7) but unless you know you have to use Legacy Python for your code you really should use Python 3.5 or above. While you don’t have access to the very latest version, Python 3.7, 3.5 is still very capable, and is great for creating some very advanced apps.
Let’s get started
First if you want to be able to save your apps on Glitch you’ll have to sign in using either a Facebook or a GitHub account.
Once you’re signed in you’re ready to go.

-
Click the New Project button at the top right. Pick any of the project types, hello-webpage, hello-express or hello-sqlite. (We’re going to delete most the files from the template and start from scratch so it doesn’t matter which you pick.)
-
Delete all the files except for the assets folder and the .env file. We’ll get to these files later.
-
Click the +New File button to create a file named “requirements.txt” with the content as below.
aiohttp==2.3.10
-
Create another file named “start.sh” as below.
pip3 install --user -r requirements.txt
python3 app.py
-
Now we get to the actual Python code. We’re going to use an HTTP server framework called aiohttp. aiohttp is a super simple Python 3 micro framework that takes advantage of Python’s built-in
asynciolibrary to build apps that allow for asynchronous code. We’ll dive deeper into why asyncronous code is better than typical synchronous Python code in a later tutorial. Due to not using the latest version of Python, we can only run aiohttp version 2.3.10 instead of the very latest version (3.4.4 at the time I’m writing this). Create a third file named “app.py”.from aiohttp import web async def handle_index(request): return web.Response(text='My First Async Python 3 Web App') if __name__ == '__main__': app = web.Application() app.router.add_get('/', handle_index) web.run_app(app)
Assuming everything worked as expected you should be able to click on the Show Live button at the top of the page to view your running app.
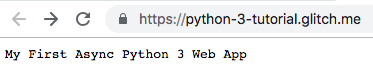
Congratulations! You’ve just created your first asynchronous Python 3 web app!
From here you can make the application as complex as you want. For example:
* using a common Python patterns like using a requirements.txt file to install modules.
* Adding folders to your project to re-structure your code to make your application more capable.
* adding some application assets to the assets folder, even binary files like images.
Please read on to Part 2 of this tutorial where we’ll re-structure the code into something you can use to build a more sophisticated application.